屋上・外壁のメンテナンス工事を開始しました(8)

外壁塗装工事の下地工事でクラック部分のシール処理になります。
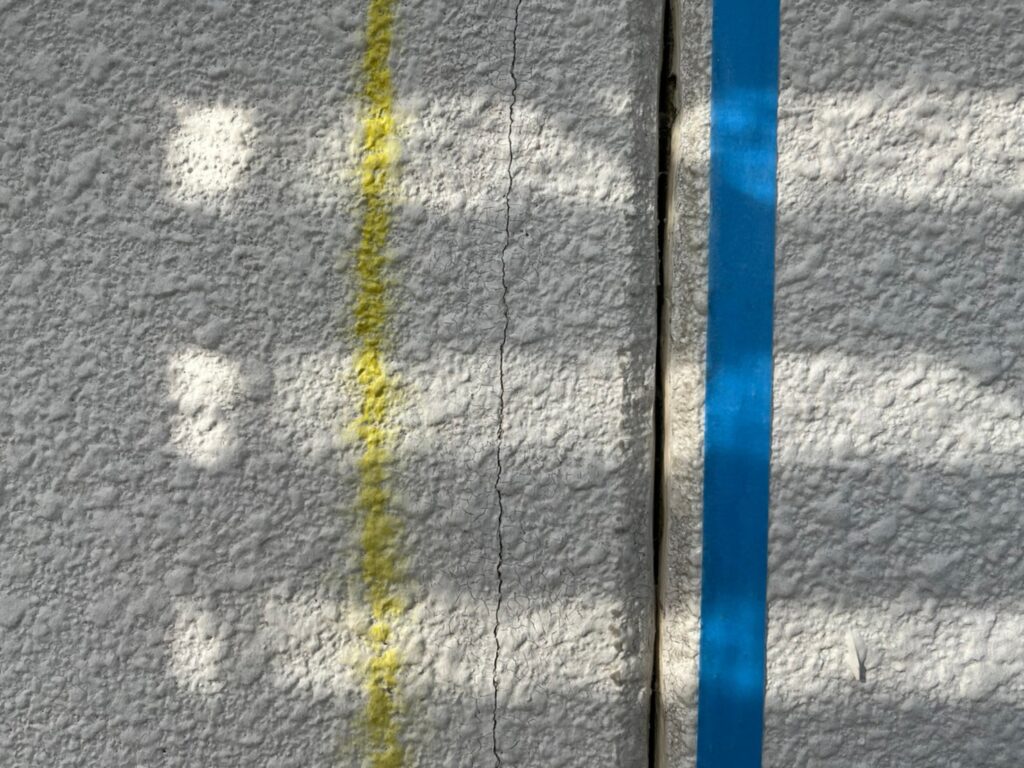
黄色い線の右側に細い線があるのですが、外壁にクラックが入っています。
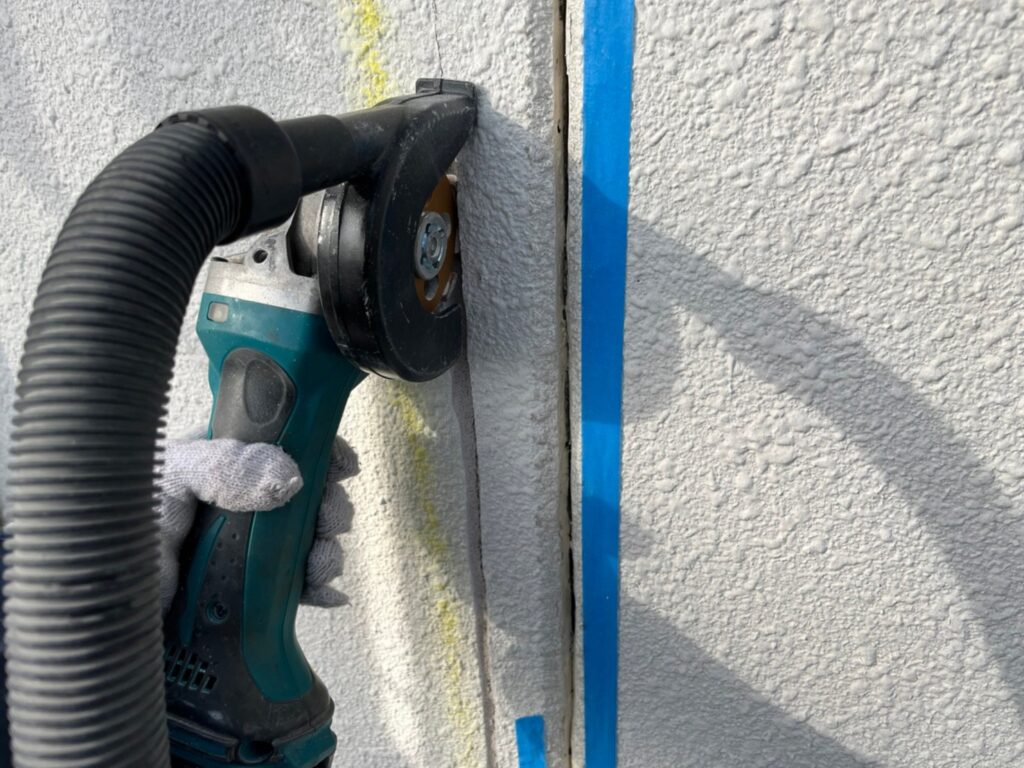
サンダーでクラック部分をV型に切り込みを入れていき、シールが付きやすく処理していきます。
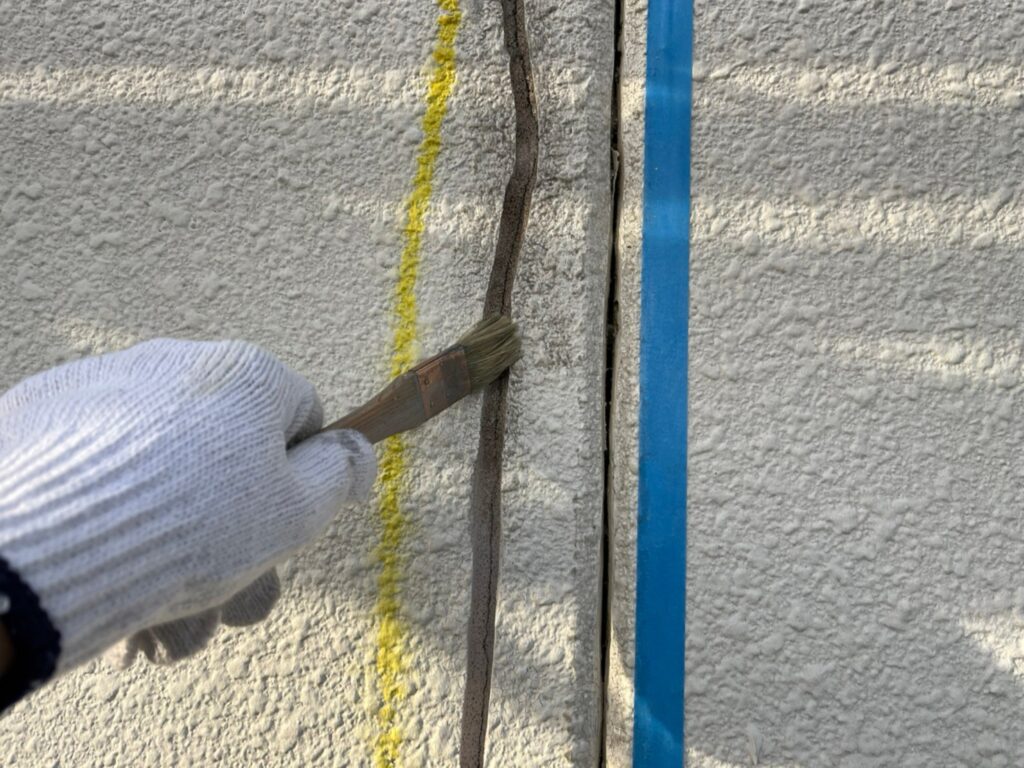
プライマーを塗布して、シールの付きを良くしていきます。
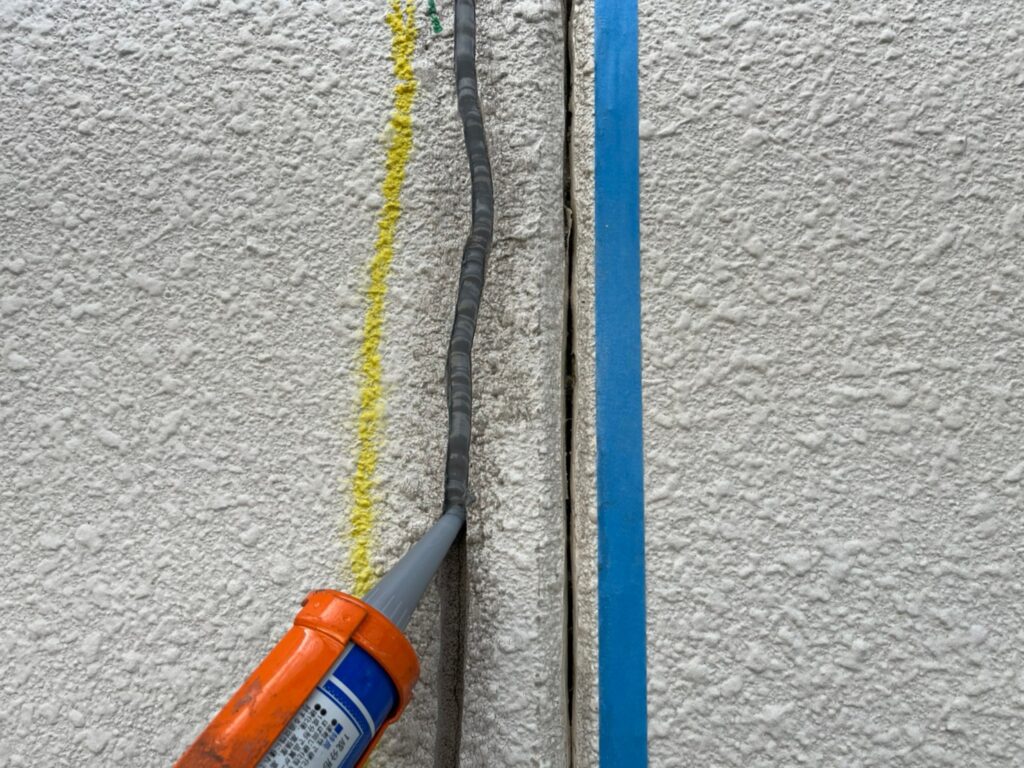

V型にカットした部分にシールを打っていきます。
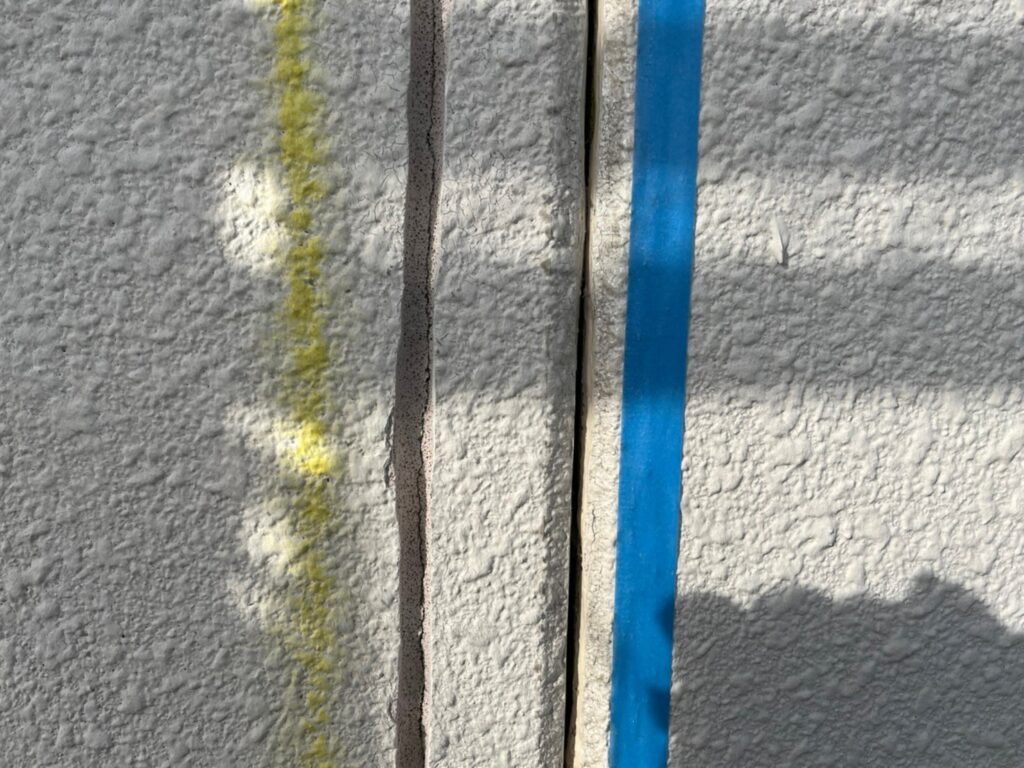
隙間が出来ないようにコテで均していって下地処理完了です。
外壁のジョイントやサッシまわり、手すりの笠木にもシール処理していく
箇所があるのでまた紹介していきます。